This “mini-lesson” shows step-by-step how I painted a hummingbird from one of my photos.
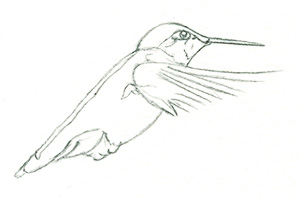
- I begin by sketching the hummingbird with an HB pencil. Make sure your drawing is accurate! Lighten the pencil lines by dabbing at them with a kneaded eraser. (Contrary to what most books say, once wet, these lines can’t be erased completely)
- I then mix the following puddles (a puddle is paint mixed with enough water to dilute it to the desired value):
- Cobalt blue + Brown Madder (warm & cool mixtures)
- Winsor Blue + Viridian Green
- Sap Green
- Alizarin Crimson + New Gamboge
- French Ultramarine + Payne’s Gray + a bit of Alizarin
- Sepia + French Ultramarine
- Next I paint the base washes of the bird.

- For the eyes, feet, and beak use the Ultramarine/Payne’s Gray / Alizarin mixture. Leave the white highlights untouched.
- For the back of the bird paint the Winsor Blue/Viridian mixture. While it’s still wet add Sap Green next to it, letting the colors bump each other.
- For the belly, let Sap Green bump into the Cobalt Blue/Brown Madder (warm) puddles, letting the colors blend alongside each other.
- For the wing and head, use both the warm and cool Cobalt/Brown Madder mixtures; then drop a little Sap Green into them while still wet.
- The rosy area under the belly is painted with Alizarin/New Gamboge.
- Allow all initial washes to dry! Never paint into an area that has started to dry.
- Add the final details
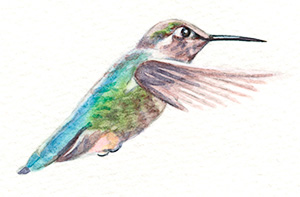
- Use the Sepia/Ultramarine mixture for dark highlights on the beak and feet as well as in the eye.
- For wing highlights use the cool Brown Madder/Cobalt mixture.
If you have any questions, please add a comment below!
Thanks,